The State of Ebin - July 2024
Jul 31, 2024It's now been three months since I started editing BruceKnowsHow's Ebin shaderpack for Minecraft, and since then, I've added quite a lot of stuff.
PBR
This has been the main focus of my efforts for this shaderpack - specifically:
Specular Lighting
Old Ebin did not have specular, at least not in any usable state. Water had reflections, and there was an option for specular mapping, but it was not in a very usable state. Firstly, turning it on turned it off, and vice versa - so it was actually on by default but this meant it was off.
Turning it on revealed why it was turned off in the first place - everything looks like it's been chrome plated.

What was happening was that Ebin was directly sampling the smoothness value from the specular map and using that as a basis for how reflective it was. I suppose this is a pretty intuitive interpretation, but it's not accurate, and doesn't work at all, as you can see. Also of interest was that instead of using the schlick approximation for fresnel, it was using the square of (1+N)⋅V multiplied by the smoothness. I can't be bothered graphing this, but to be fair, for water, this does a reasonable job. The main issue is that instead of rougher surfaces having blurrier reflections, the reflection is simply faded based on smoothness, which doesn't look great. I suppose for optimisation's sake, the best thing to do would have been to generate a singular blurry version of the screen and mix with it based on smoothness, which would look passable, if not physically accurate.
I spoke to Bruce about all of this, and his justification for how he did things was pretty reasonable:
"there was no standard PBR back then, and I was friends with the continuum owner who would talk my ear off for 4 hours about BRDF approximations. I decided whatever he was saying was not what I wanted to spend time thinking about, so I did the minimal possible thing to get water and maybe a shiny metal"
To rectify this, I completely rewrote this function to use the schlick approximation and make rougher surfaces vary the reflected ray direction more, following the pretty commonly used microfacet model. This went through a few iterations - I started off just by generating a random normal within a hemisphere aligned to the normal and lerping between the normal and the random normal based on the roughness (also adding more samples, the default is 4). The next step I followed was to implement a slerp function which means that instead of just interpolating each component of the vector, the vector is rotated by the required amount towards the target vector. This is more accurate, but also a fair bit slower. Finally, I got around to using a GGX distribution. I don't really understand how these work, but it's a function which takes in a normal, two random values, a roughness, and gives you another normal to use for your reflection. Specifically, I used this implementation by Zombye.
I also tried using mipmaps to add a less noisy base to the reflections, but the issue is that at higher mip levels, you end up with bright stuff leaking into reflections it shouldn't, which looks like bloom is being reflected.
I also went through a few iterations on the noise used for the random normal. At first I used white noise, using a prng, which looked fine with enough samples, but was very obviously...noisy, otherwise. After some experimentation with blue noise, I ended up using something called interleaved gradient noise which is notable because it is 'low discrepancy' (meaning it does not have areas of concentrated high or low frequency) without repeating itself, like dithering does. This results in an image that, while still noisy, appears smoother at a glance.
Also of note is the complete lack of specular highlights, which meant that although the sun showed up in reflections, it was very dim. Not having specular highlights but having SSR is an interesting choice in my opinion, like having a car with a satnav but no sound system.
I initially tried just boosting the brightness of the sun, but this didn't give great results, especially since it still required that on rougher surfaces, one of the reflection samples actually hit the sun. For a while I kept tweaking this trying to get it to look passable, but eventually I decided to just do things properly, and add a separate specular highlighting function. Initially I used the blinn-phong model for this, but the problem is that it treats all light sources as point lights, which means that for a perfectly smooth surface like water, the reflection of the sun is infinitely small. A simpler fix for this is to just use a minimum value for roughness, say 0.02, but this still didn't look great, so instead I went ahead and used an approximation for GGX spherical area lights by the team behind Horizon Zero Dawn for their Decima engine.
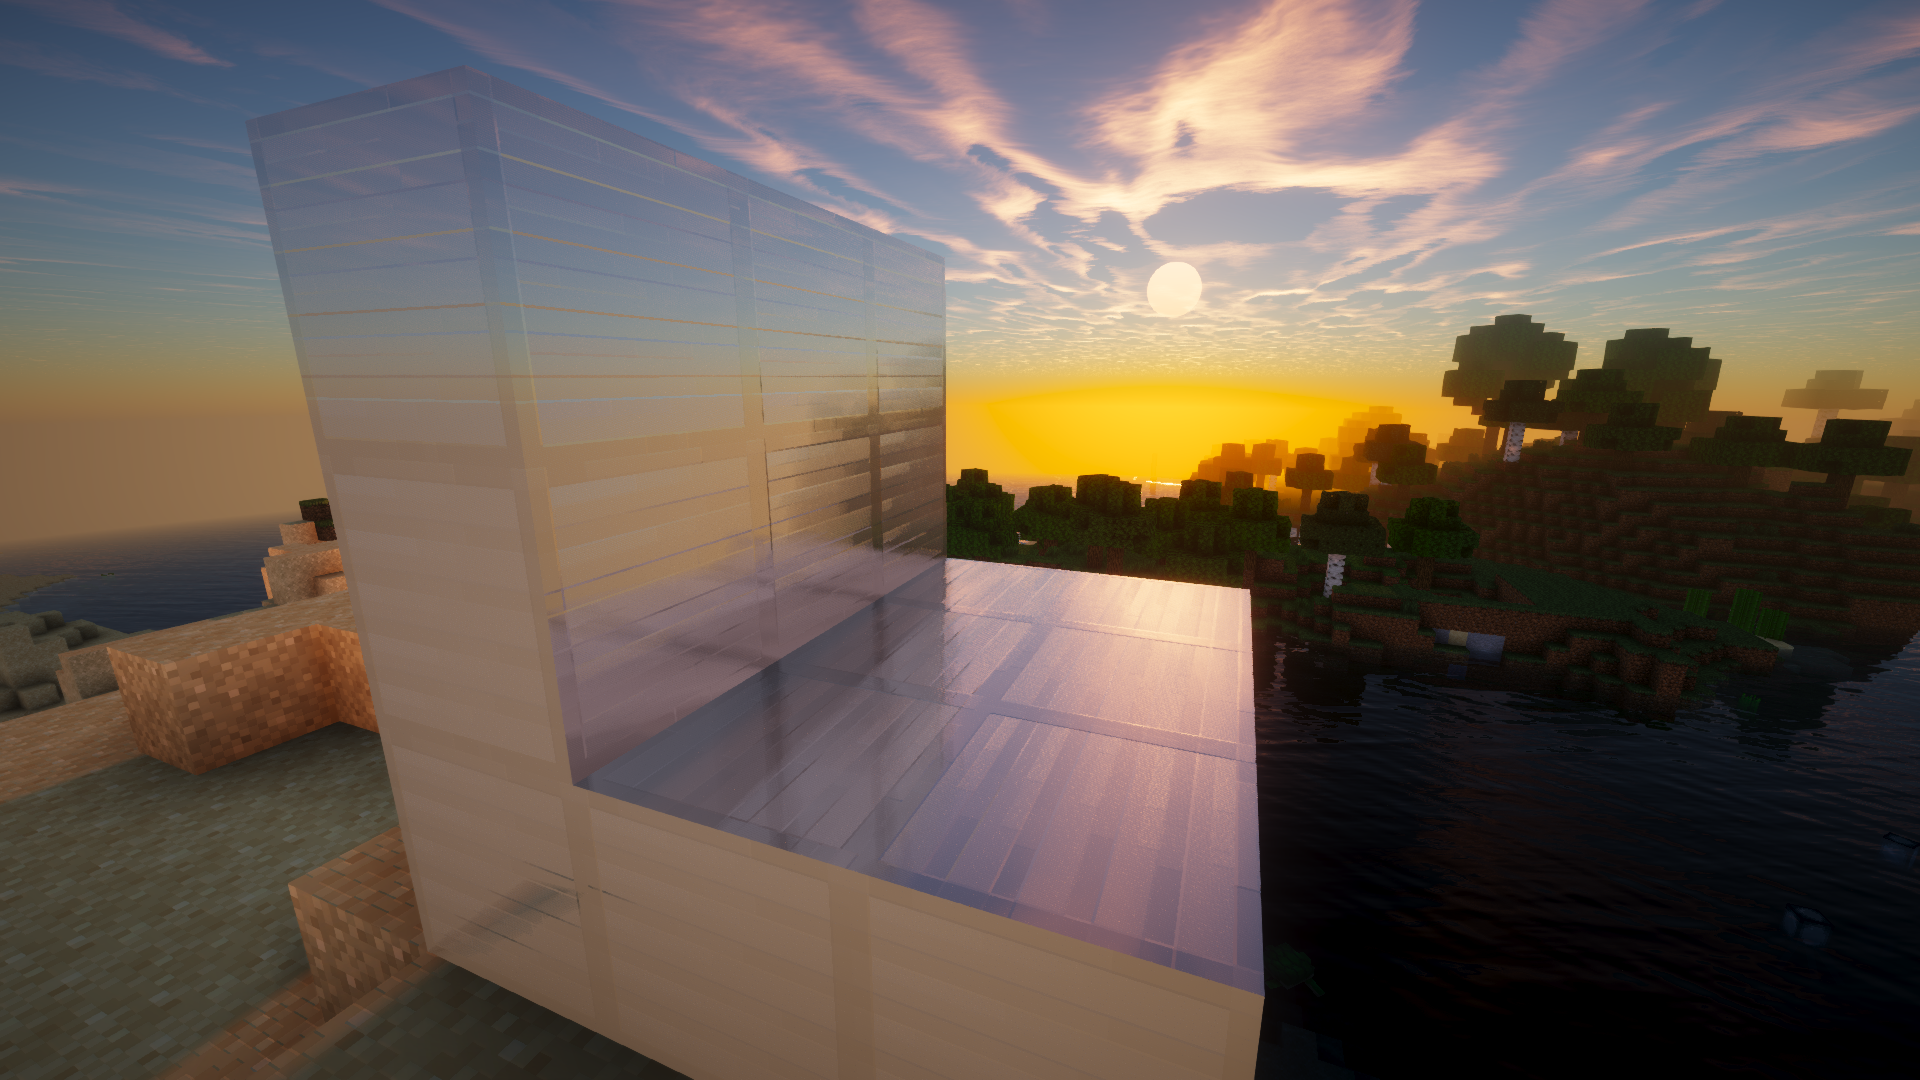
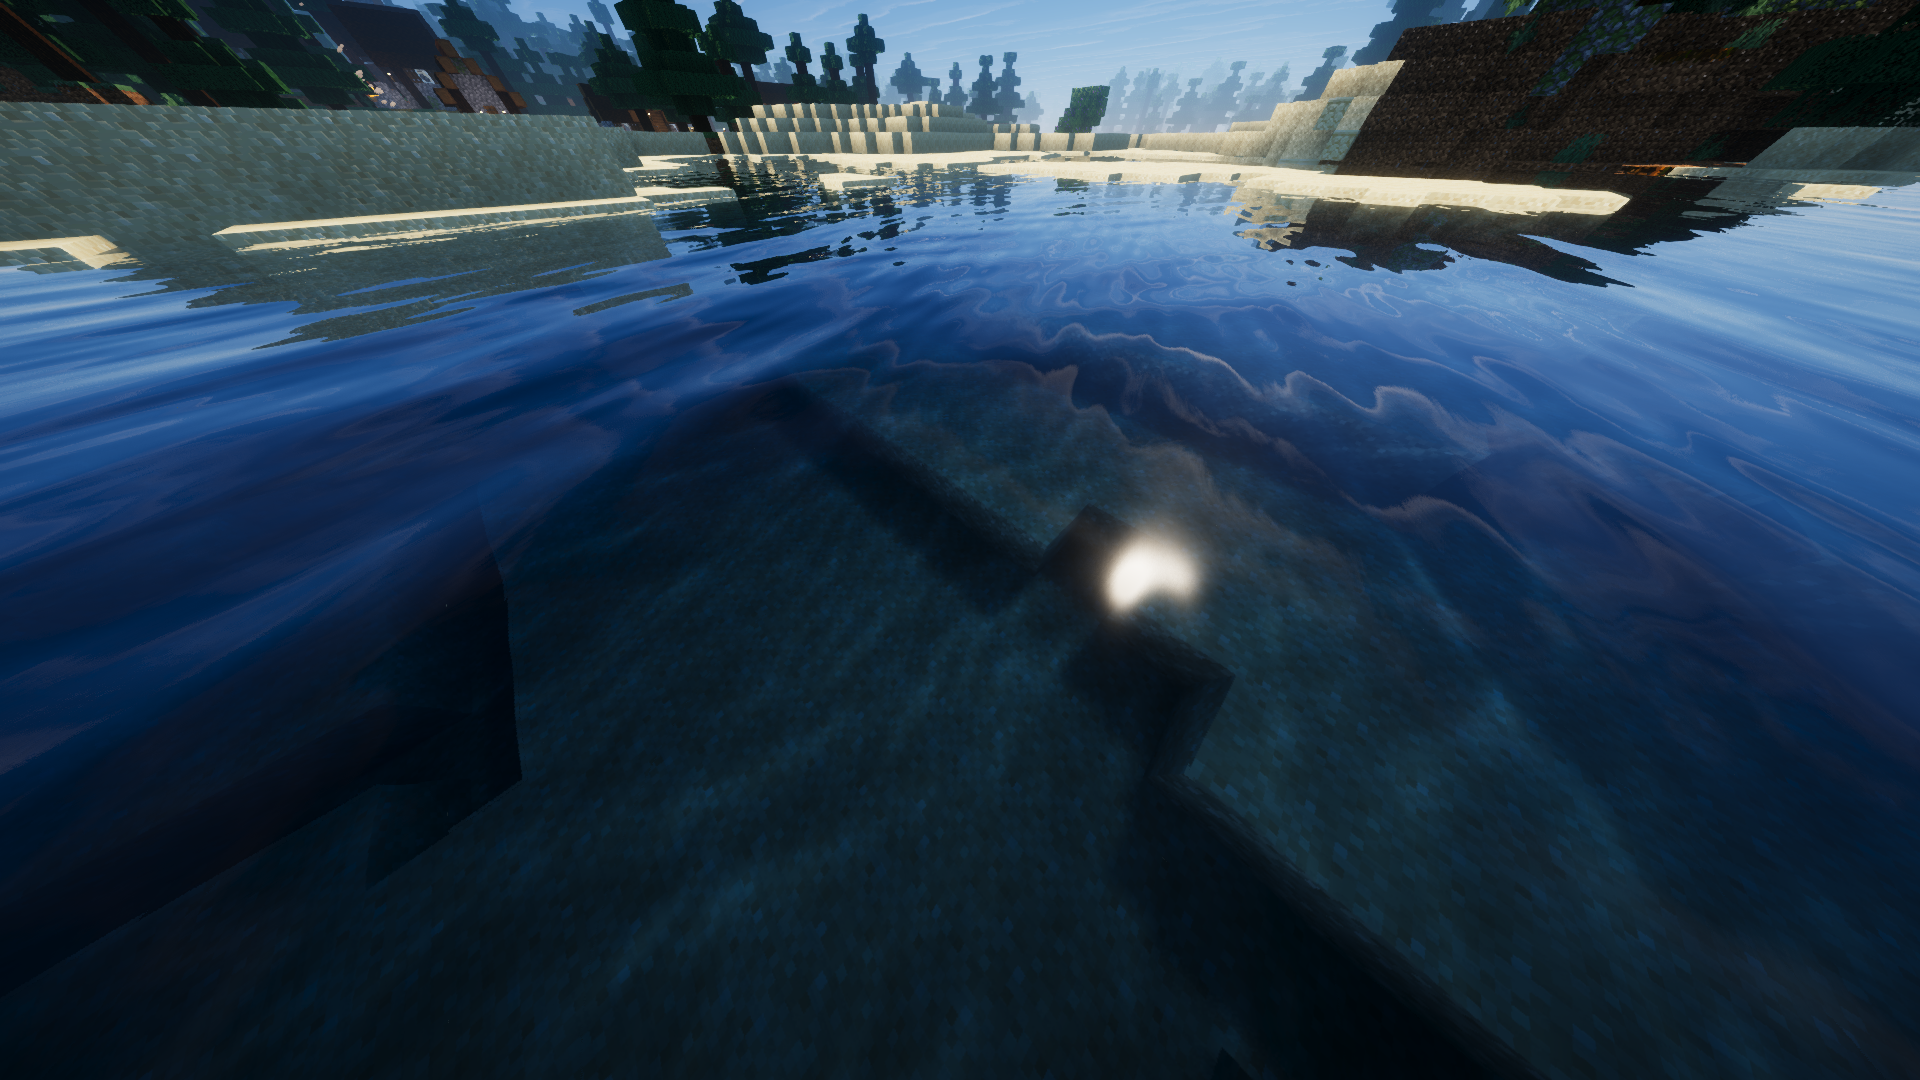
With all that added, reflections now look like this!
Shadows
Old Ebin's shadows were fast and did the job, but didn't have a lot of leeway in them. Most importantly (in my opinion), they did not support transparency, so stained glass would cast a solid shadow. This was relatively simple to implement, but I also wanted to have 'variable penumbra' shadows - where objects further away would cast softer shadows. Neither of these were particularly hard to implement, and were some of the first things I did. The VPS was implemented using NVIDIA's 'PCSS' algorithm as outlined in this paper;
Other PBR Stuff
The labPBR standard has the following parameters that can be set by the resource pack
- Roughness
- Reflectance (f0)
- Porosity (how much water is absorbed when wet)
- Emission (how much light the pixel emits)
- Subsurface Scattering (how much light can pass through something)
- Normal
- Ambient Occlusion (basically how darkened the pixel should be)
Of these, I still needed to implement emission, porosity, SSS, and AO. AO was pretty simple - just reduce the ambient lighting, the rest, varying amounts. I will cover porosity in the later paragraph on weather.
Subsurface Scattering
The approach for this was outlined for me by Tech who gave me the following function (from a Realtime Rendering Article)

"If you want me to give you a head start, this would be a very good physically based approximation to that "falloff" you guys were talking about earlier. "rho", the p looking character would be your albedo and s (for the sake of brevity here) can be something like 1.0 / subsurface while z is the distance from the entry point to the exit point which you can calculate using the shadow map. I recommend blurring z slightly to get rid of sharp edges. Of course there is a lot more to this if you were trying to do this more accurately, but I won't get into that here."
With some back and forthing and messing with values, I was able to get something working, and for leaves specifically, it makes things look a lot better.
Emission
Emission was something I found quite fun to implement. Since Ebin already works in a HDR colour space, to make stuff 'glow', all I had to do was increase the ambient lighting based on the emission, such that emissive pixels were a lot brighter, and so would appear to 'glow'. It did, however, send me down a rabbit hole of iPBR (integrated PBR), which sets the PBR values without a resource pack. Initially, I simply set the emission value for all blocks that emit light using the following function:
float generateEmission(PBRData data, float lumaThreshold, float satThreshold){

  // I have conversion from rgb to hsv earlier on

  float luma = data.hsv.b;
    float sat = data.hsv.g;

  if(luma < lumaThreshold){
    return smoothstep(satThreshold, 1.0, sat);
  }

  return luma;
}
iPBR
As time went on, though, I decided to make it easier to set values for different blocks, and so overhauled the block.properties file to actually make sense. Previously, I'd just been modifying the existing file, which had some weird tomfoolery with backporting IDs to older versions of Minecraft. I did away with this, and added IDs for a bunch of different blocks, putting them in different ranges, so that, for example, I know that blocks between 1000 and 2000 emit light.
I then added a bunch of helper functions and #DEFINEs, and now it's a lot easier for me to give a block an ID and set different PBR values. Using this, the first thing I did was to add some subtle reflections to leaves, which gives them a nice sheen. This was inspired by photon, a very nice shaderpack I've been using as a reference at times while adding stuff.
Something I do want to try switching to, though, is block-wrangler, a pretty cool project designed to streamline the process of adding IDs to blocks. When I started on this, the project was too early in development to be usable, but the next time I set something like this up I'll definitely give it a try, and you should too!
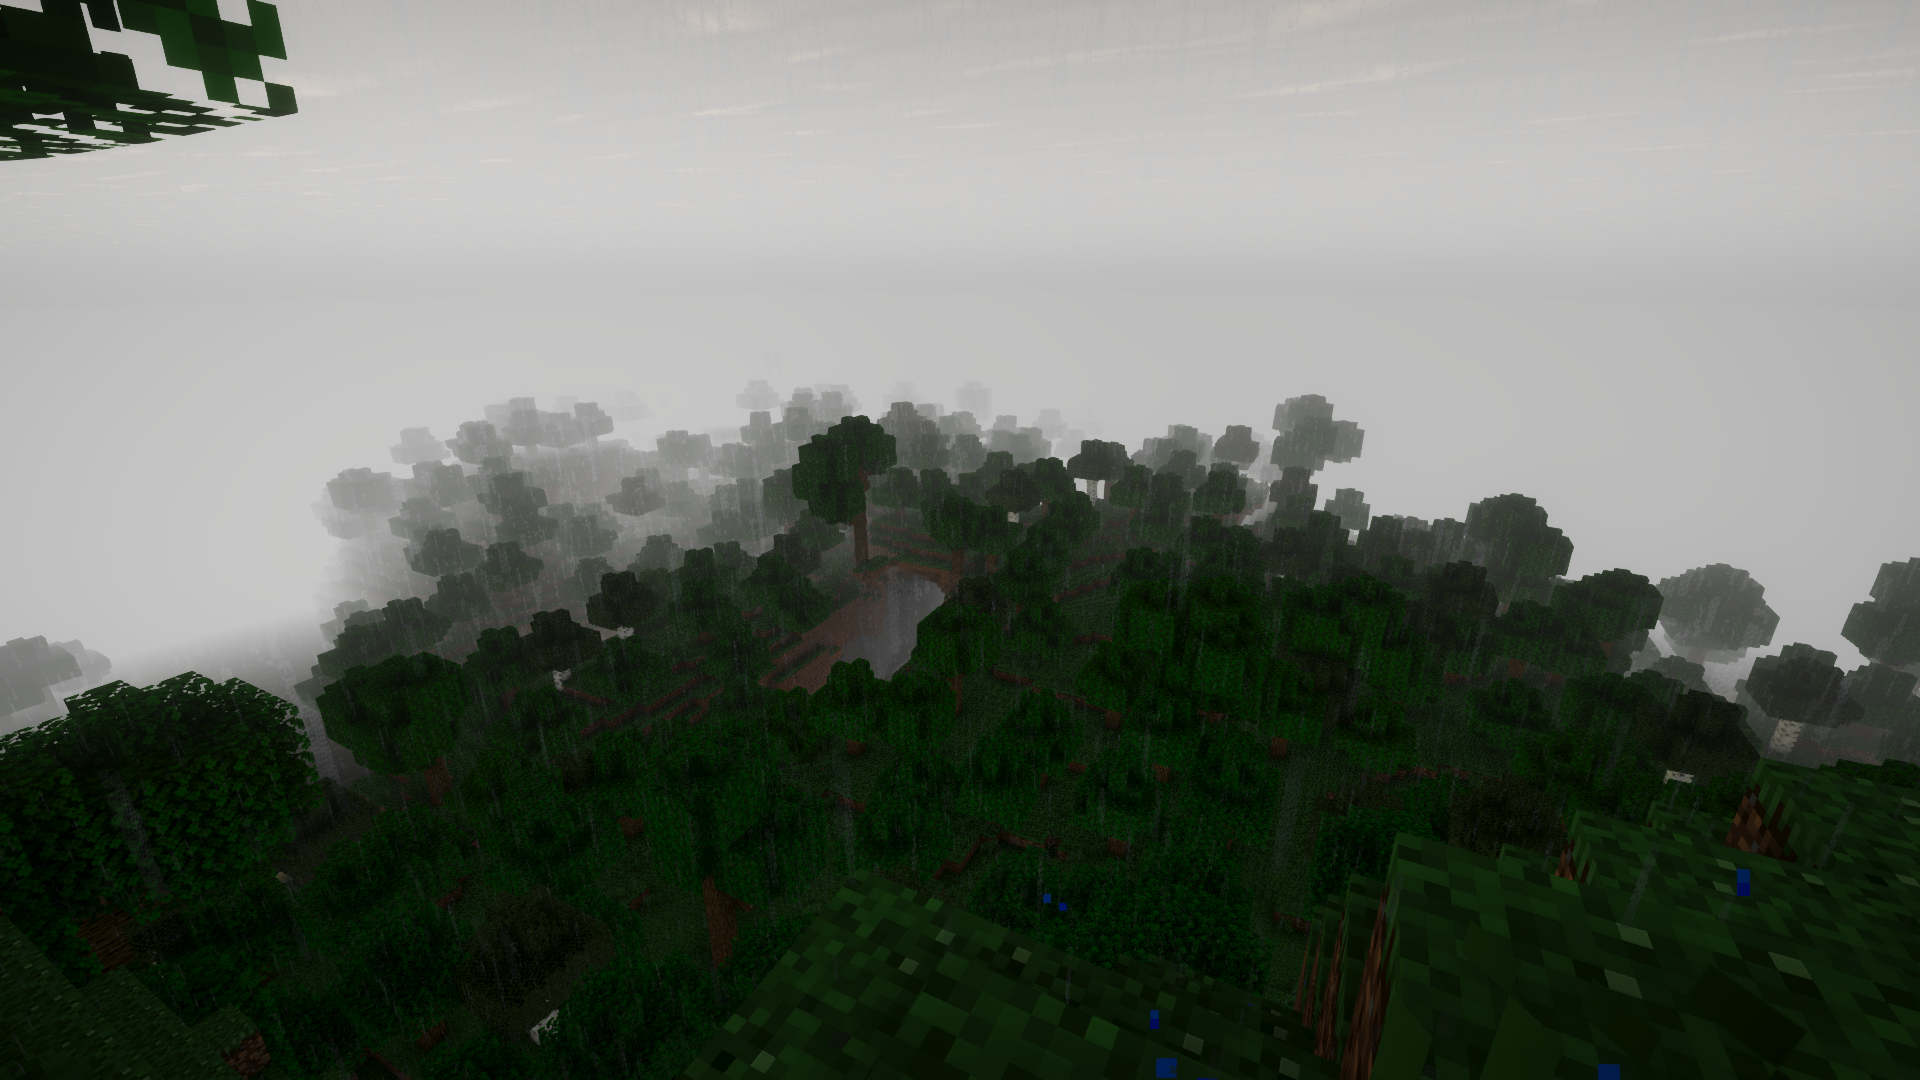
Weather
Old Ebin hasn't had any kind of support for weather since it migrated from using a precalculated gradient to a physically based sky. The first thing I set out to do was make it so the clouds would come in when the rain came. I managed to do this by modifying some of the values in the cloud code based on wetness. It's not the cleanest, but it works, so I'm happy. The next thing I did was incorporate porosity, so more porous blocks will become darker when it's raining, whereas less porous blocks will become more reflective.
Getting raindrops to work was a bit more of a hassle. Most modern shaders use 'forward rendering' for transparent surfaces, which means that all transparent surfaces have lighting applied to them before they are blended together. This means that things look correct, but is a lot less efficient, as transparent surfaces which are not actually visible have lighting done for them. Ebin, instead, uses deferred rendering, which means that transparent surfaces are rendered in a fullscreen pass. What this means, however, is that only the transparent surface closest to the player gets shaded. Since raindrops are transparent, anything transparent behind them (such as water), doesn't get rendered, which looks bad.
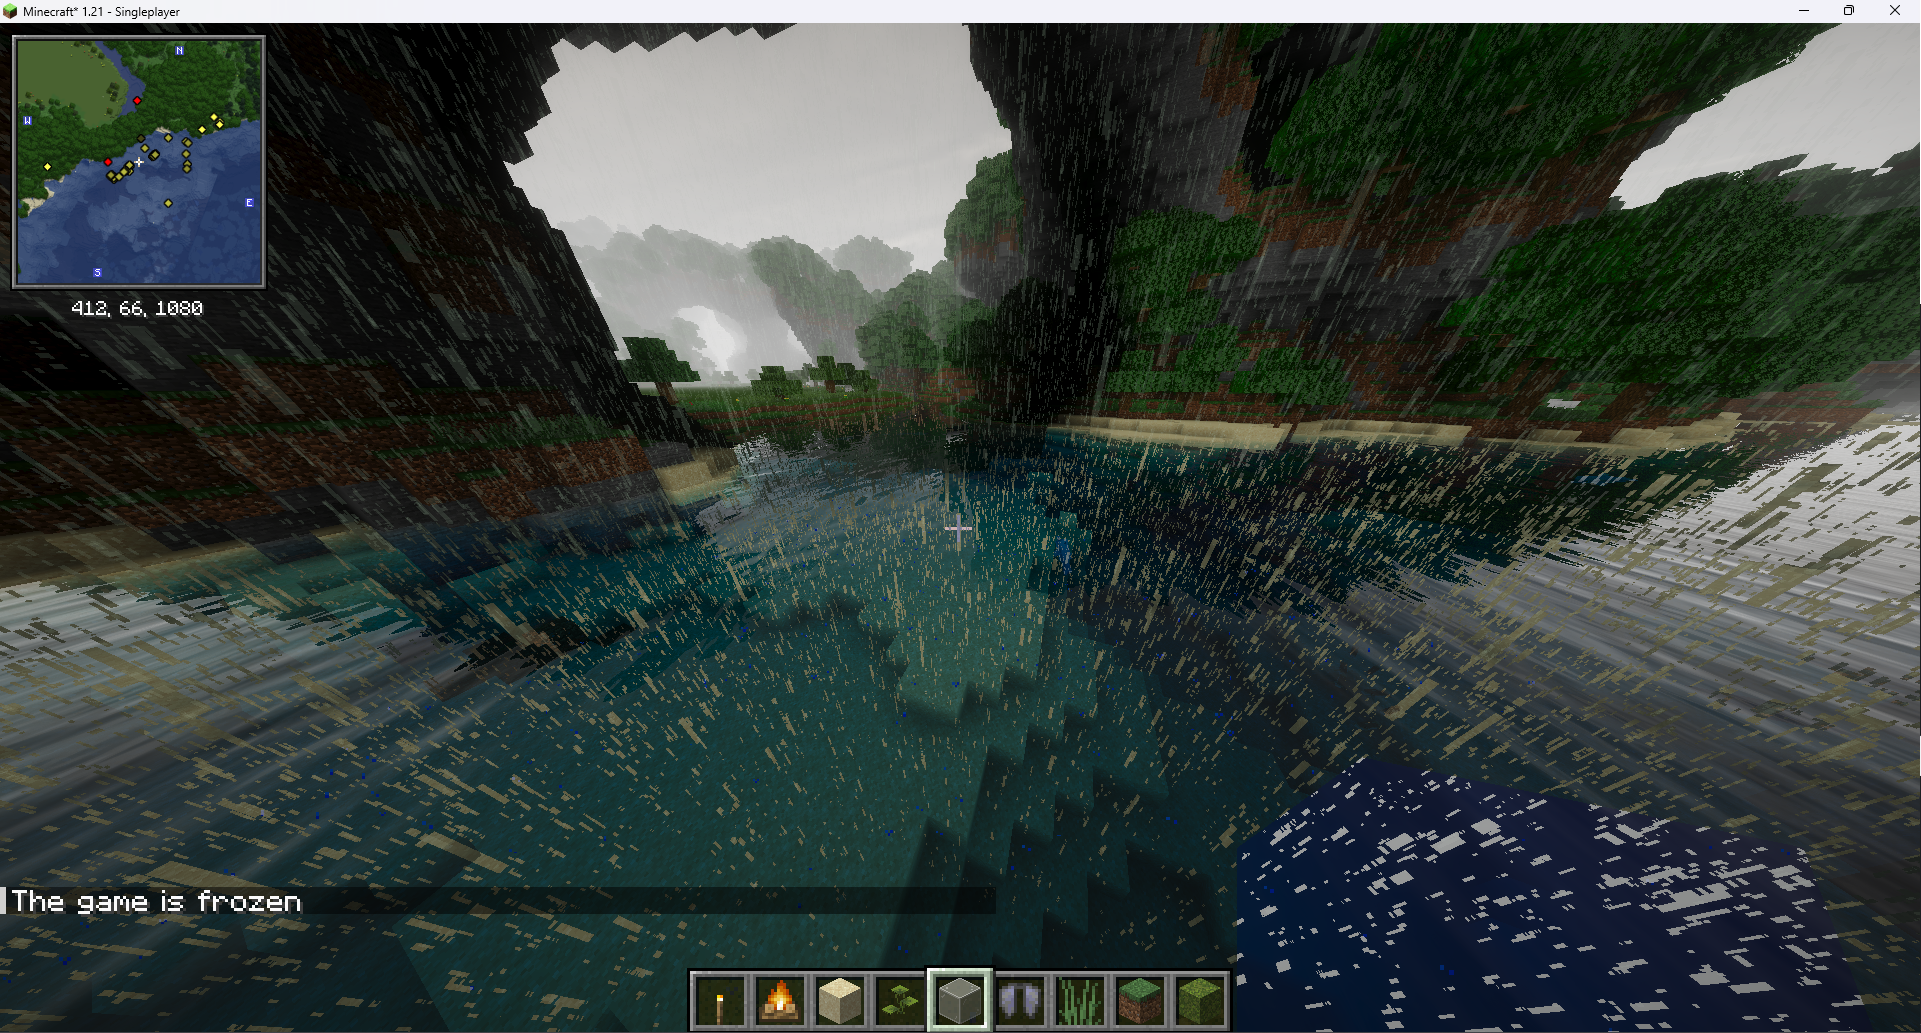
The rather novel solution I ended up using to solve this was to 'dither' the rain to give the illusion of transparency, as suggested by JoyousCreeper1059. I set some pixels to be completely transparent (so the water renders behind them) and some to be almost fully opaque (so you can't see the water through them), and this looks a lot better.
Initially I used a standard Bayer dithering pattern, but at the suggestion of CyanEmber, I used interleaved gradient noise instead, which is actually what got me using it for reflections as well.
Alpha Blending
Whilst messing around with the rain, I encountered a general problem with Ebin - it decides whether to blend transparent things in by checking if the depth buffer containing transparent and opaque stuff has a different value to the depth buffer containing only opaque stuff. This is all well and good until something which doesn't write to the depth buffer (like the world border) is on screen. It's just as trivial to sample the texture containing transparent stuff and check the alpha value, and this works for all transparent stuff, depth writing or not.
Whilst doing this, I decided it was worth refactoring the entire second composite pass, so I did that as well, making the code a lot more simple. Bruce's approach for blending things seems to be having a 'transmit' variable which is set in a function and then used to blend the two, using something like a * transmit + b * (1.0 - transmit). In glsl though, you can just use mix(a, b, transmit).
Coloured Lighting
Something all the cool kids are doing these days is coloured lighting. This is far from trivial to implement, because the default minecraft lighting engine does not differentiate light sources, it just sets the brightness for each block and allows you to interpolate it.
The first attempt I made at this was to port the coloured lighting from Capt. Tatsu's BSL Shaders. Unlike most shaders, BSL uses a system that works only with what's on the screen. Essentially, it writes only light sources to a texture, and then blurs that texture a bunch, and that texture is sampled for light colours. In BSL, this works quite well, but no matter how hard I tried, I could never quite get it to work well in Ebin. The colours just wouldn't spread properly at times, so you'd have a nice lit ellipse around the light source, but the rest of the screen would use the default light colour. Particles would also interfere with this, as they would overwrite the light source with black in the texture.
Instead, I know use a 'floodfill' based solution which works in actual world space, which also means that light sources offscreen can still be coloured. The gist of this is to have a 3D custom image (a special kind of texture you can write to anywhere), which you write the colours of light sources to at their position in player space, and then allow this light to spread within the image by repeatedly, for each voxel in the image, taking an average of the surrounding 6 voxels.
My initial method for this ran from scratch every frame. Since light can propagate 15 blocks, this required me to have 15 passes, each one sampling every voxel 6 times. That's a lot of samples in one frame, and had a serious impact on my framerate. A better solution is to only take one average per voxel per frame, and just store the result between frames.
For the old method, since you are reading and writing to the same image, you end up actually needing two custom images, because otherwise depending on which voxel gets updated first, the average of other voxels ends up being different. By using two, you can read from one and write to the other, swapping them each pass. This is known as 'buffer flipping' and the same approach is used by Optifine and Iris for each of the textures it lets you write to.
For the new method, I use the two buffers differently. Since the player can move, the voxel map has to be able to shift as well, so instead, one image stores the voxel map for the previous frame, and another one stores the voxel map for the current frame. This means that when sampling the voxel map from the previous frame, we need to know where the voxel in the current frame was in the previous frame. This took some finagling to get to work, but with the help of Balint, Null, and Belmu, I eventually succeeded.

Right now, the propagation doesn't take into account that blocks will...block light from passing through them. Since I sample the vanilla lightmap for brightness, this mostly looks fine, but a next step would be to stop light colours propagating through blocks.
Directional Lightmapping
This was another project that took some effort to get working. With CyanEmber and Balint, (mostly them tbh), we put together a system which would use openGL's dFdx and dFdy functions to get the direction the light is travelling in using only the lightmap. I also tried using a method by NinjaMike, but I found it didn't work any better, so I stuck to the one the three of us developed. It's not perfect, and some blocks are inexplicably fully lit, for some reason, so it's still a work in progress.
Refraction
Refraction is something a bit more minor but I thought was worth adding. Essentially, when light enters water, it bends, and it is possible to replicate this effect by reflecting the view ray with the normal of the water, and then using the same screen space tracing function to find where the refracted ray hits. This works, although it looks a bit weird when very close to the water. The other problem is that if the ray goes offscreen, you have nothing to display. What I do is just use the un refracted colour as a fallback, but if you're close to water, this is noticeable. According to Jessie, this can be improved by subtracting the face normal from the mapped normal, but I don't currently pass the mapped normal down the gbuffer, so I need to do this first.
Also interesting is that whilst underwater, in order to get 'Snell's window', I had to modify my fresnel approximation to account for total internal reflection. I actually can't remember where I found this modified function so I will need to google it again and credit it appropriately.
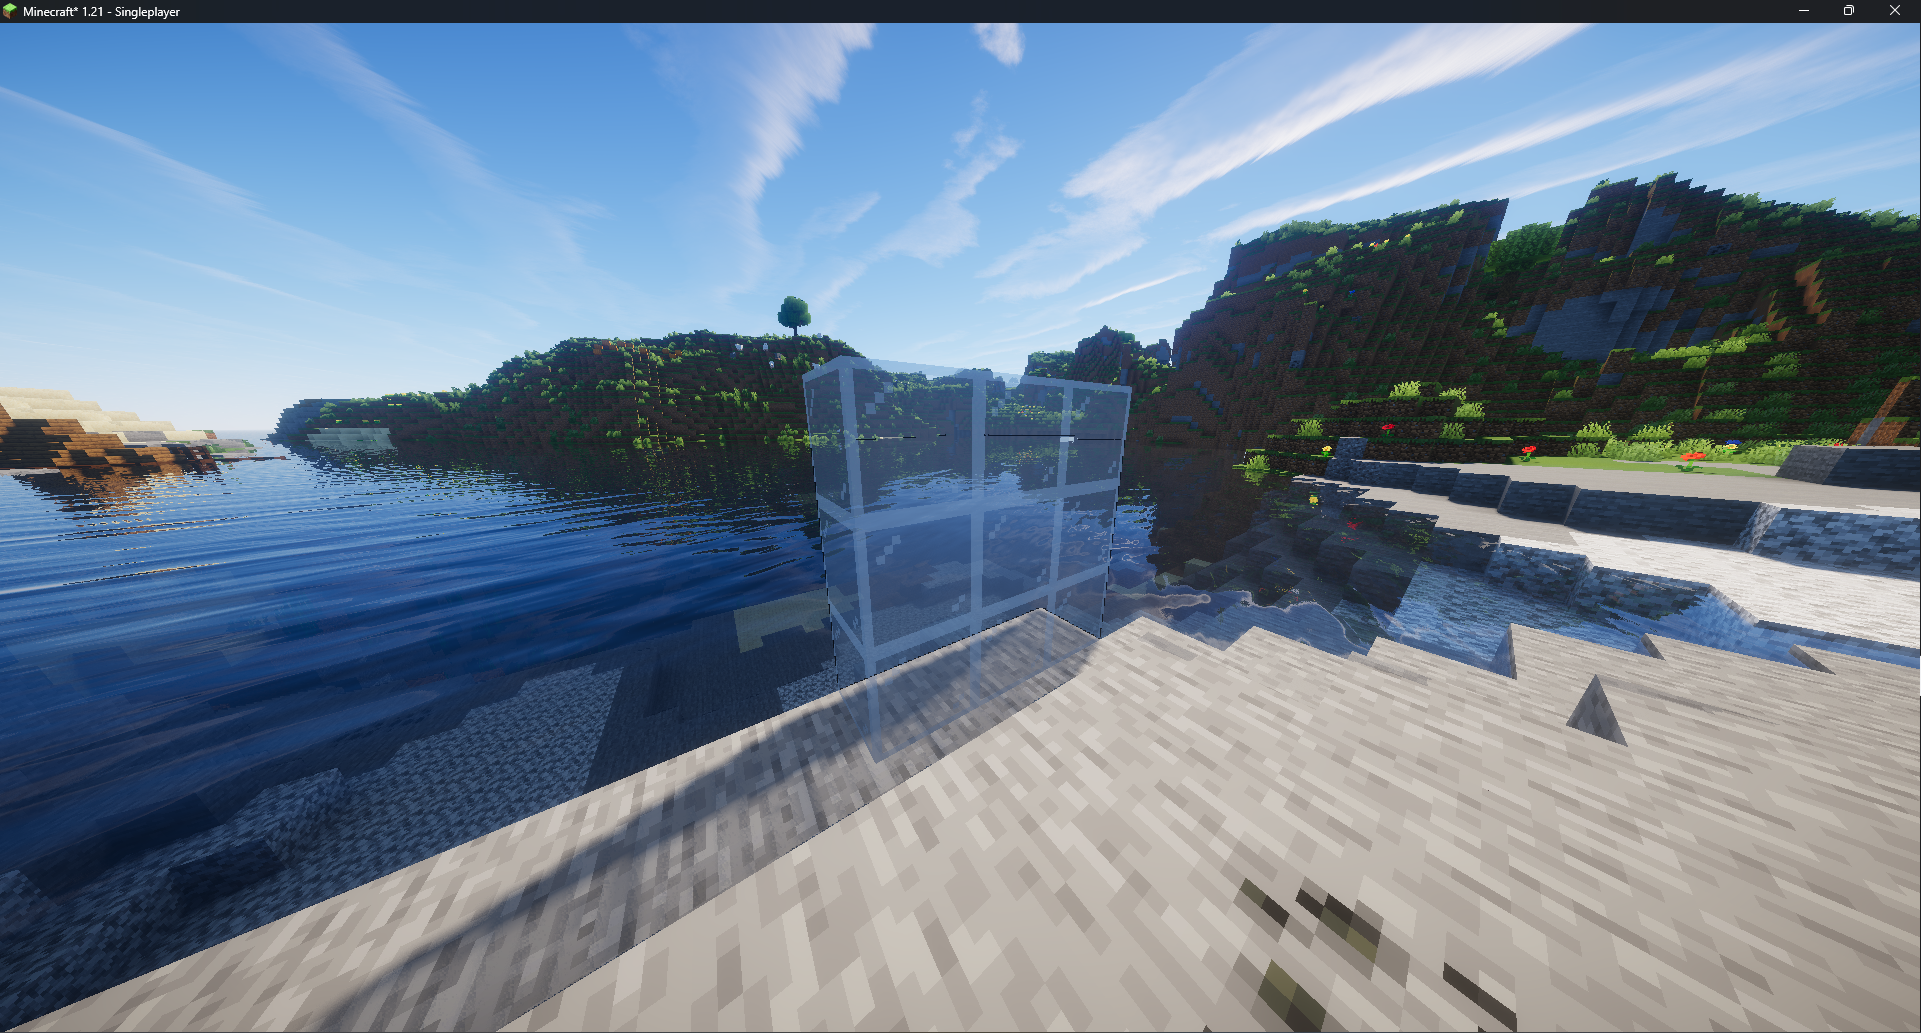
Water Behind Glass
For shaders which don't use forward rendering for translucents, a common issue is that looking through your lovely stained-glass window, the water in the river you built your beautiful house next to is invisible.
This is, of course, because of the aforementioned issue that only the translucent surface closest to the player is rendered correctly.
Earlier, I lied. Translucent surfaces are actually forward rendered. But only for diffuse lighting. The problem is, water doesn't really have any diffuse lighting. My solution to this was to render water completely separately again. Using custom images, I created a custom depth buffer only for water. Another image then stores the normal of the water, and using these two buffers, I can render water behind stained glass.
The method I use isn't perfect though. If multiple blocks of water are visible along the same axis, I need to make sure I have the data for the one closest to the camera. For this I use something called Atomics. For the depth, I can atomically min the depth, basically saying "if the current depth is less than the depth in the image, store it instead". But how do we do this with the normals?
We don't, at least not for now. Since the normal has no information about how far it is from the camera, we can't use atomics on it. What I try was packing the water depth into the first few significant bits of the normal. This would mean a value with a smaller depth would have a smaller value for this packed normal. Unfortunately, I couldn't get it to work, so instead I ended up with this:
uint normalInt = floatBitsToUint(EncodeNormal(normal, 11));
  float depth = gl_FragCoord.z;
  uint depthInt = floatBitsToUint(depth);
  uint oldDepth = imageAtomicMin(waterdepth, ivec2(floor(gl_FragCoord.xy)), depthInt);

  if (oldDepth > depthInt){ // we wrote the new depth, so write the normal
    imageStore(waternormal, ivec2(floor(gl_FragCoord.xy)), uvec4(normalInt, uvec3(0)));
  }
So what's the issue? Well, because GPUs run in parralel, there's a very much nonzero chance that between the atomic operation and the storing of the normal, another depth value is written. When viewing the normal directly, this is very apparent.
In practice though, it's not noticeable. So while theoretically this could break completely, it looks fine.
Other Stuff
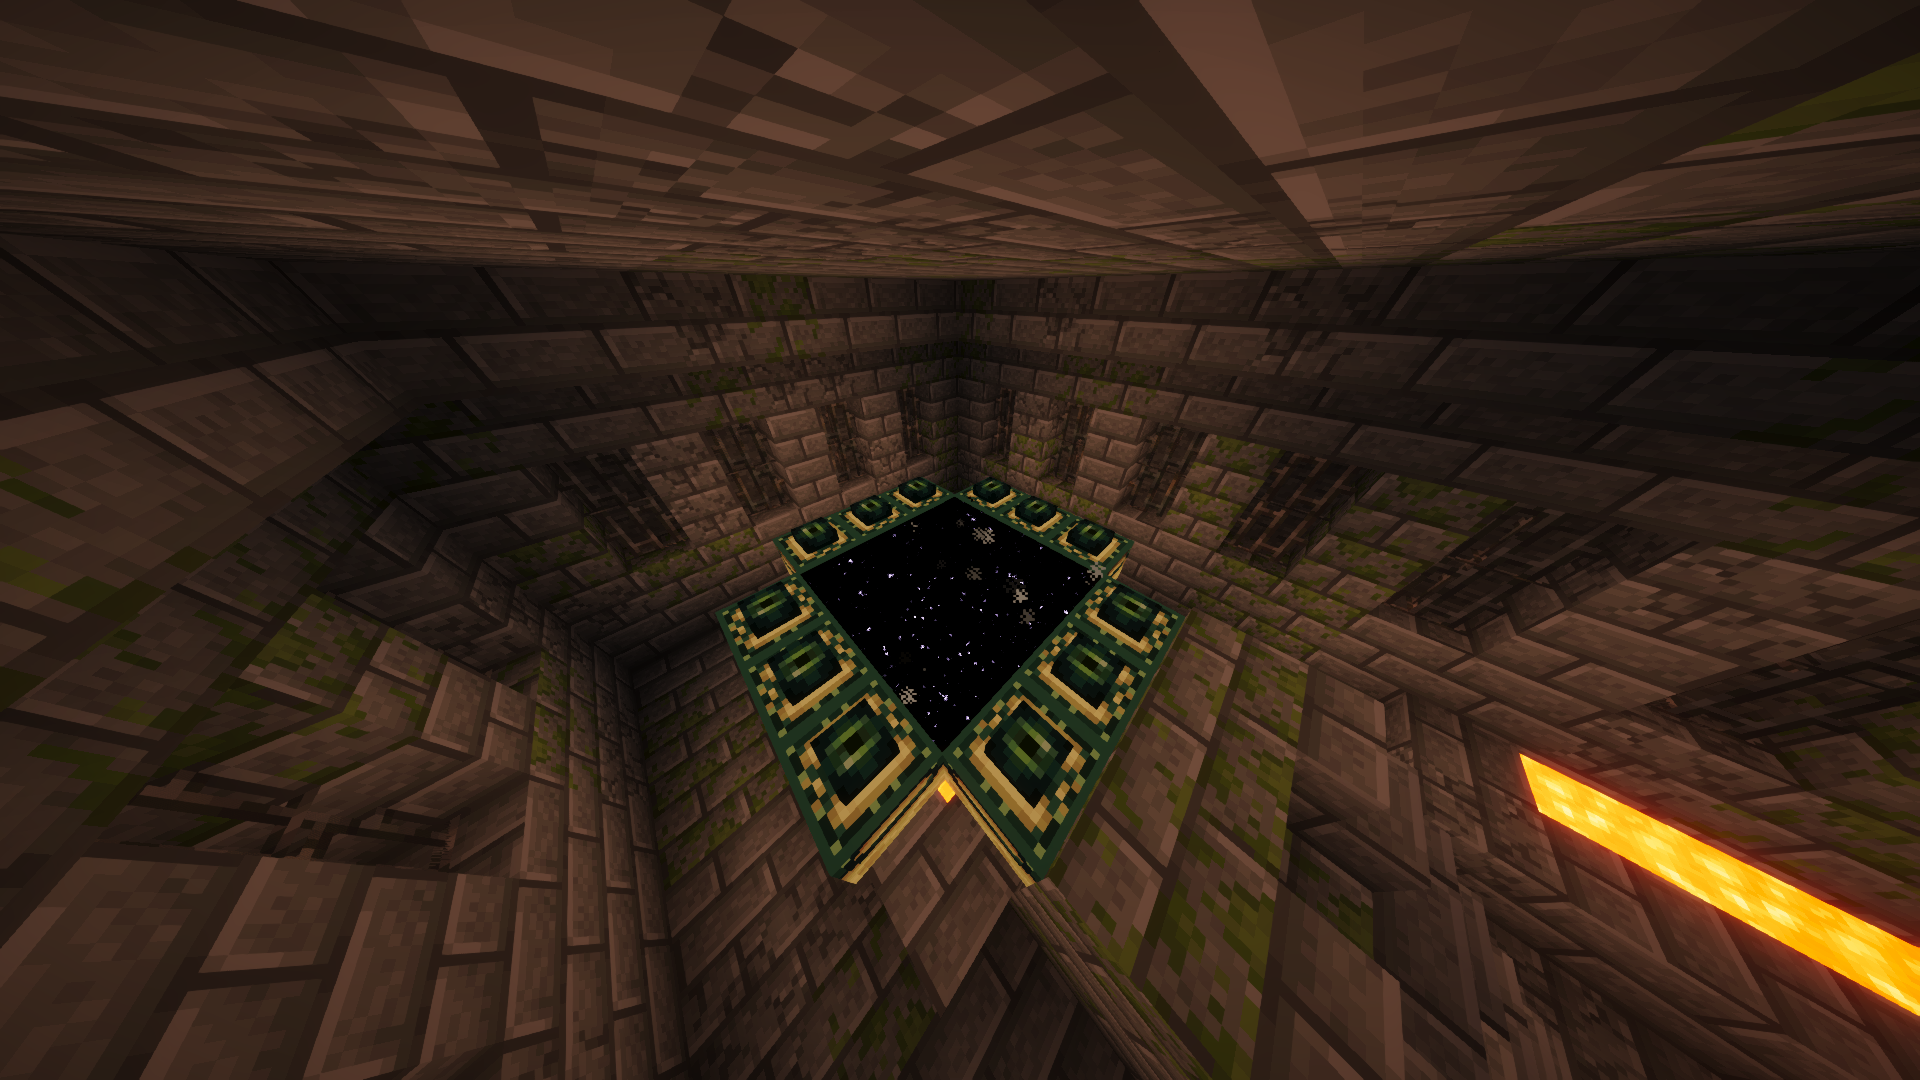
End Portal
I added an effect to end portals, reusing the same code used for the stars in the night sky. One issue with this is that approaching the horizon, you don't get many stars, which works fine for the end portal which you look down into, but end gateways are something you look into sideways. Beats them being fully black anyway.
End Skybox
My long term plan for the End dimension is to add a raymarched skybox. I've got a few ideas on how I want to do this.
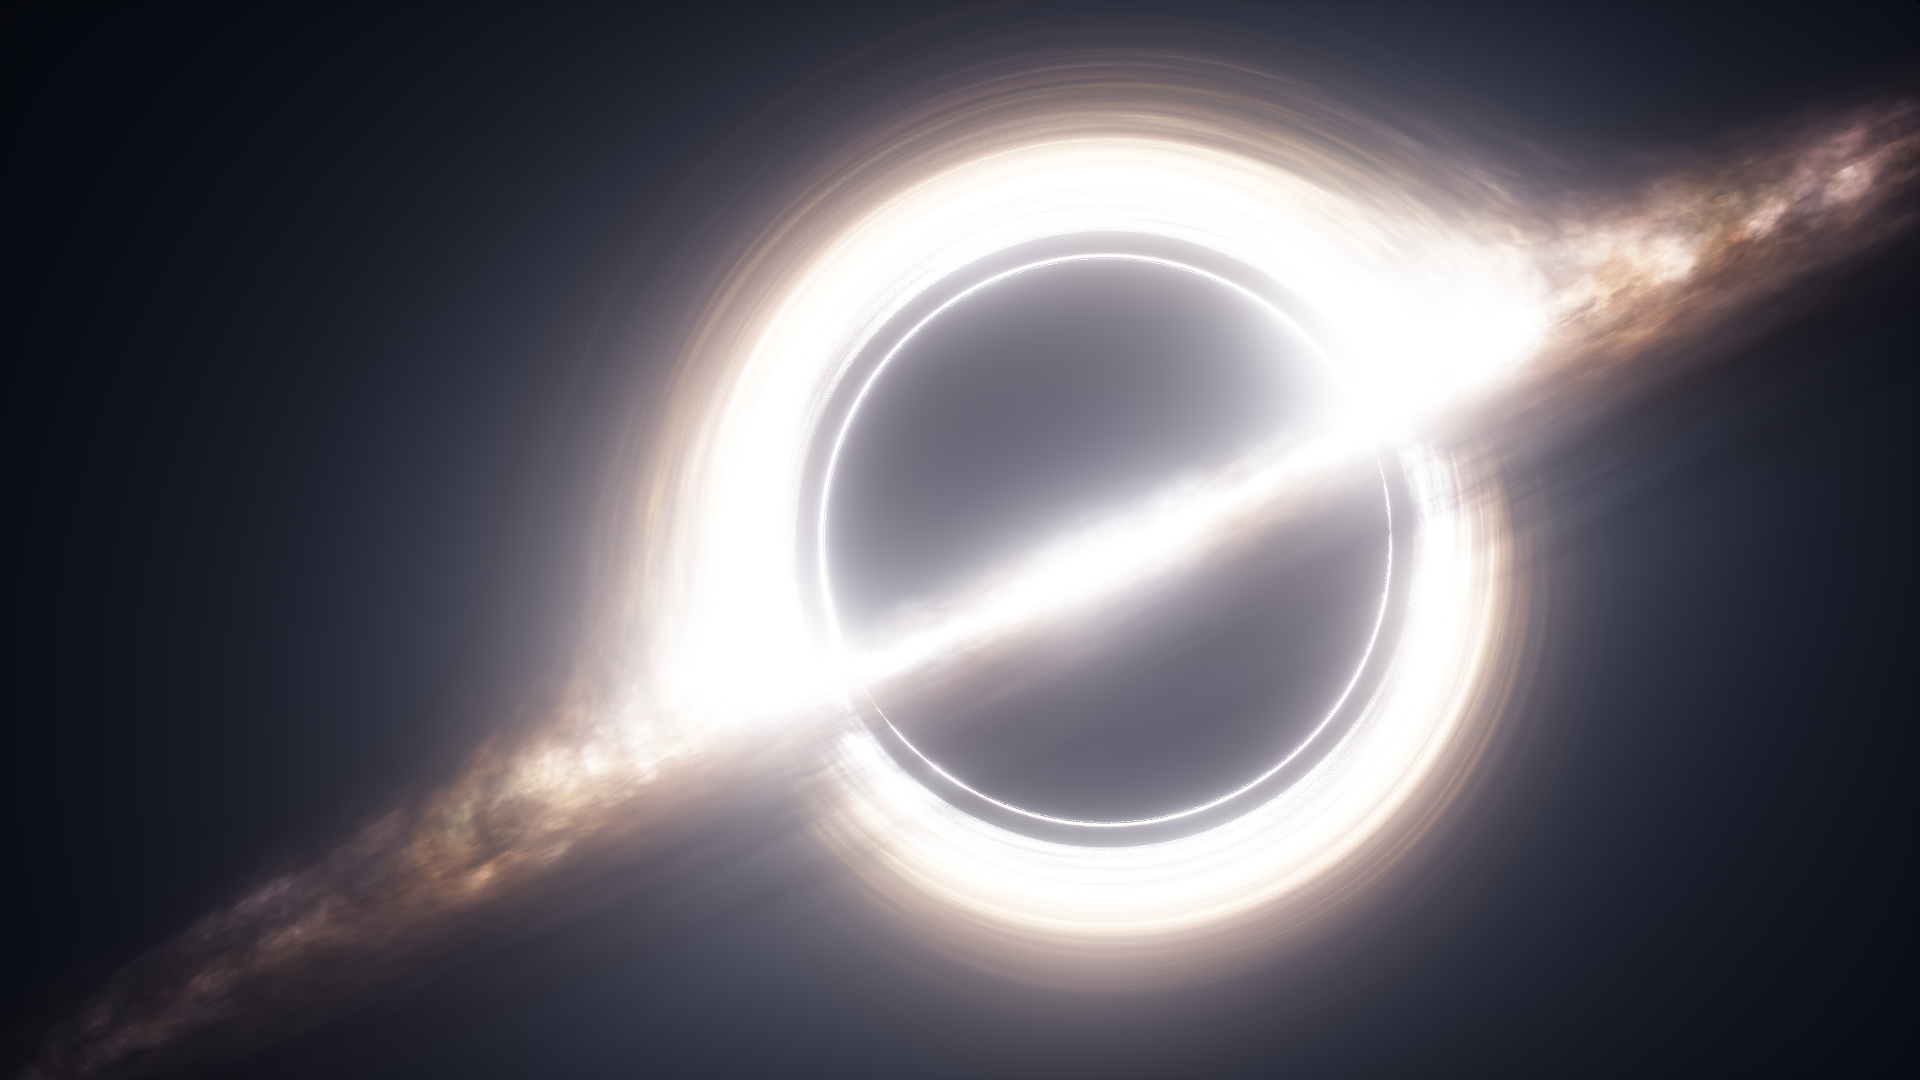
Neutron Star
A lot of shaders use a black hole as their end skybox, so I thought it might be nice to push the boat out a bit. I've always loved how the neutron stars look in Elite: Dangerous, so one option is to try to recreate something like the screenshot below.

Sonic Ether Blackhole
One of the main selling points for the notorious iterationT shaders (a shaderpack which uses stolen code from a variety of other places without credit or following their license) is the end skybox, which uses a black hole Sonic Ether made on shadertoy. Now, this black hole is actually under a public license, so if I actually credit it correctly, it would be reasonable to use it. Since Ebin was originally (as described by Bruce) a 'SEUS rewrite', it might be fitting to implement this into the shader.
Chromatic Shadow Thing
After Ebin, another shaderpack Bruce developed was Octray (and subsequently OctrayRewrite). OctrayRewrite has a very cool end skybox composed of several coloured orbs. This is pretty clearly designed to show off the path tracing capabilities with the chromatic shadows but I think it could be possible to implement a similar effect with traditional shadow mapping techniques. Since Octray came after Ebin, I see it somewhat as 'Ebin with PT', so it might be fitting to try and implement this.
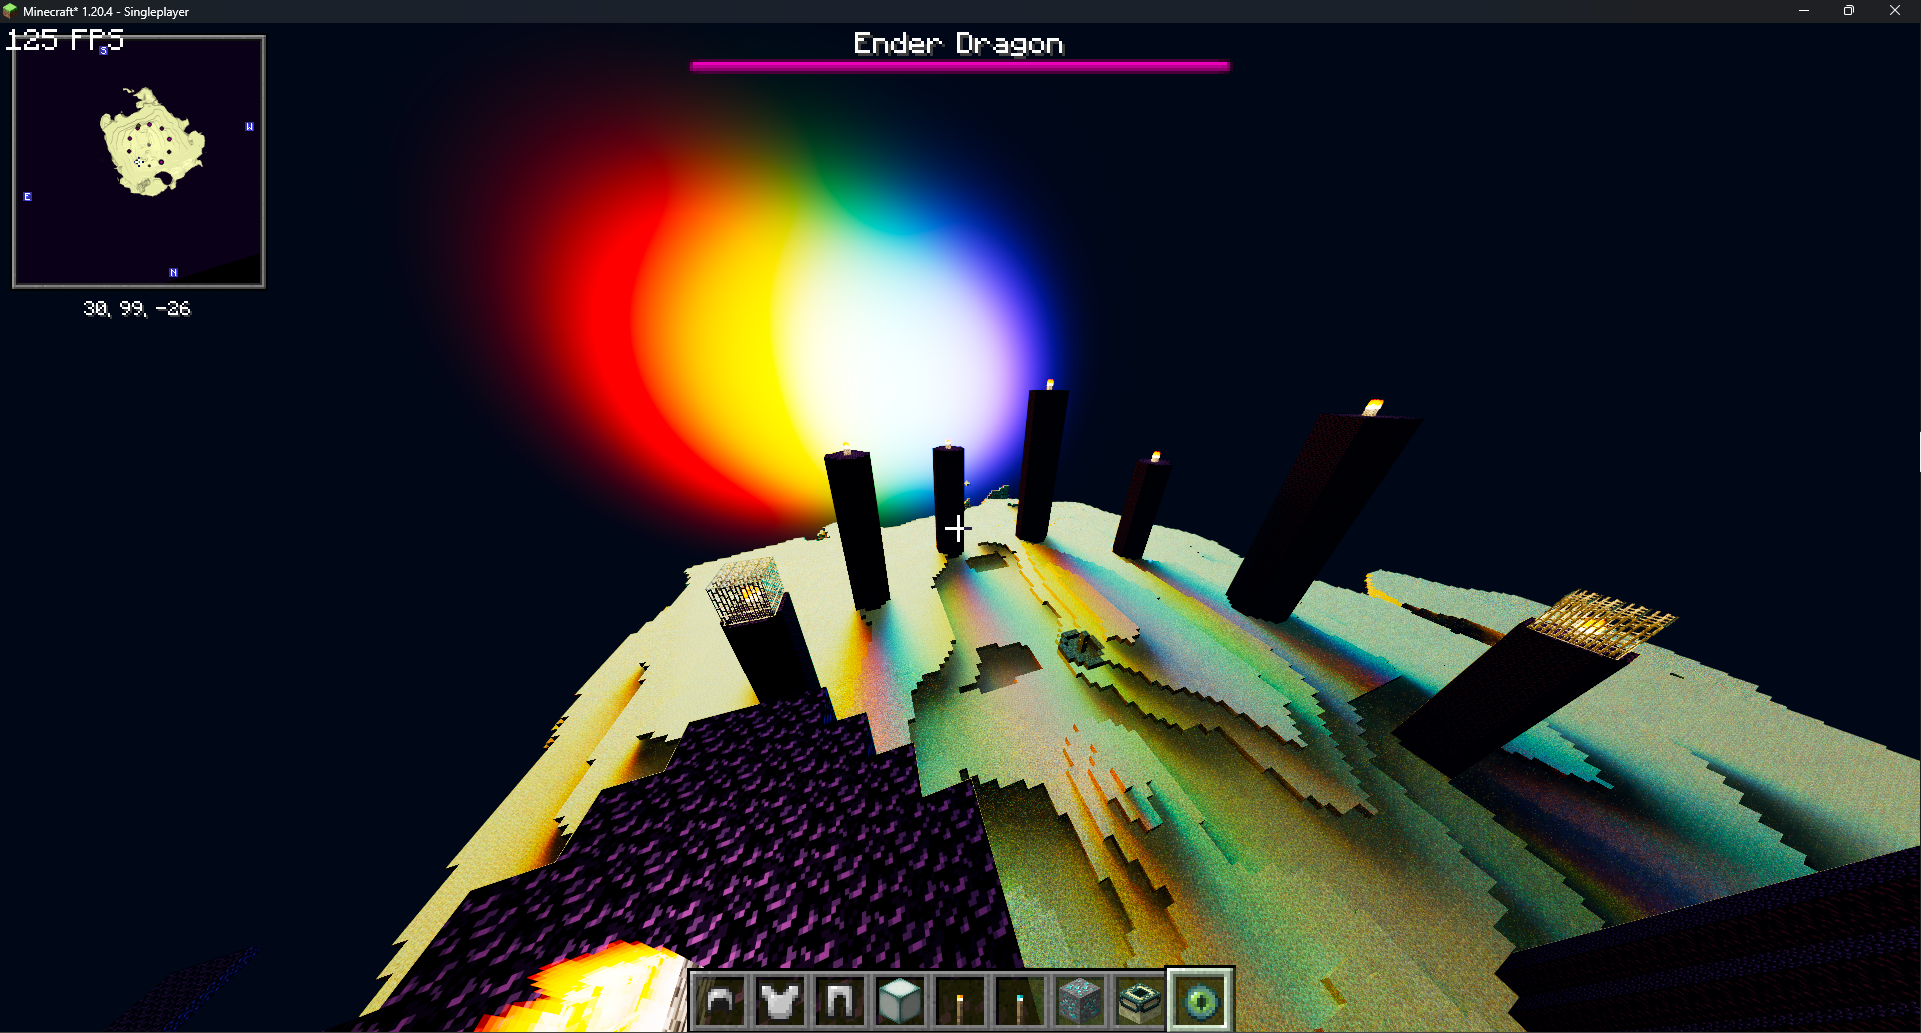
Regardless, in the meantime I hadn't planned to do anything with the end sky (which was just rendered as black), until someone in shaderLABS told me the end sky was broken. When I asked what was wrong with it, they said it was all black, at which point I realised this didn't look great. As a stopgap, I've just added a simple purple gradient.
FXAA
I ported BSL's FXAA. Not much to say here.
What Next?
So I think that's pretty much everything I've done so far. If you've read to this point I applaud you. Here are a few of the features I have planned:
- Distant Horizons Support
- End Skybox
- Better floodfill
After that, who knows? I am occasionally working on another shaderpack, Glint, which I am building from the ground up. I also have plans for a path traced shaderpack called GleamPT which is half written, but the code to build the voxel structure doesn't work and I couldn't be bothered debugging it, so I need to rewrite it in python so I can debug it in a sane manner.
I'd like to again thank everyone in the shaderLABS Discord server for pretty much teaching me everything I now know about Minecraft shaders and a lot of what I know about graphics programming - particularly Balint, who spends so much of his free time answering my and so many others' questions.
adios